Introduction
This integration enables outbound for both SOAP API and REST API external calls to create process definition workflows. Multiple integration events can be configured as a single installed automation integration.
Automation integration is created based on one of the following types of events:
- Alert
- Resource
- Incident
- Task
- JSON Object
- Service Request
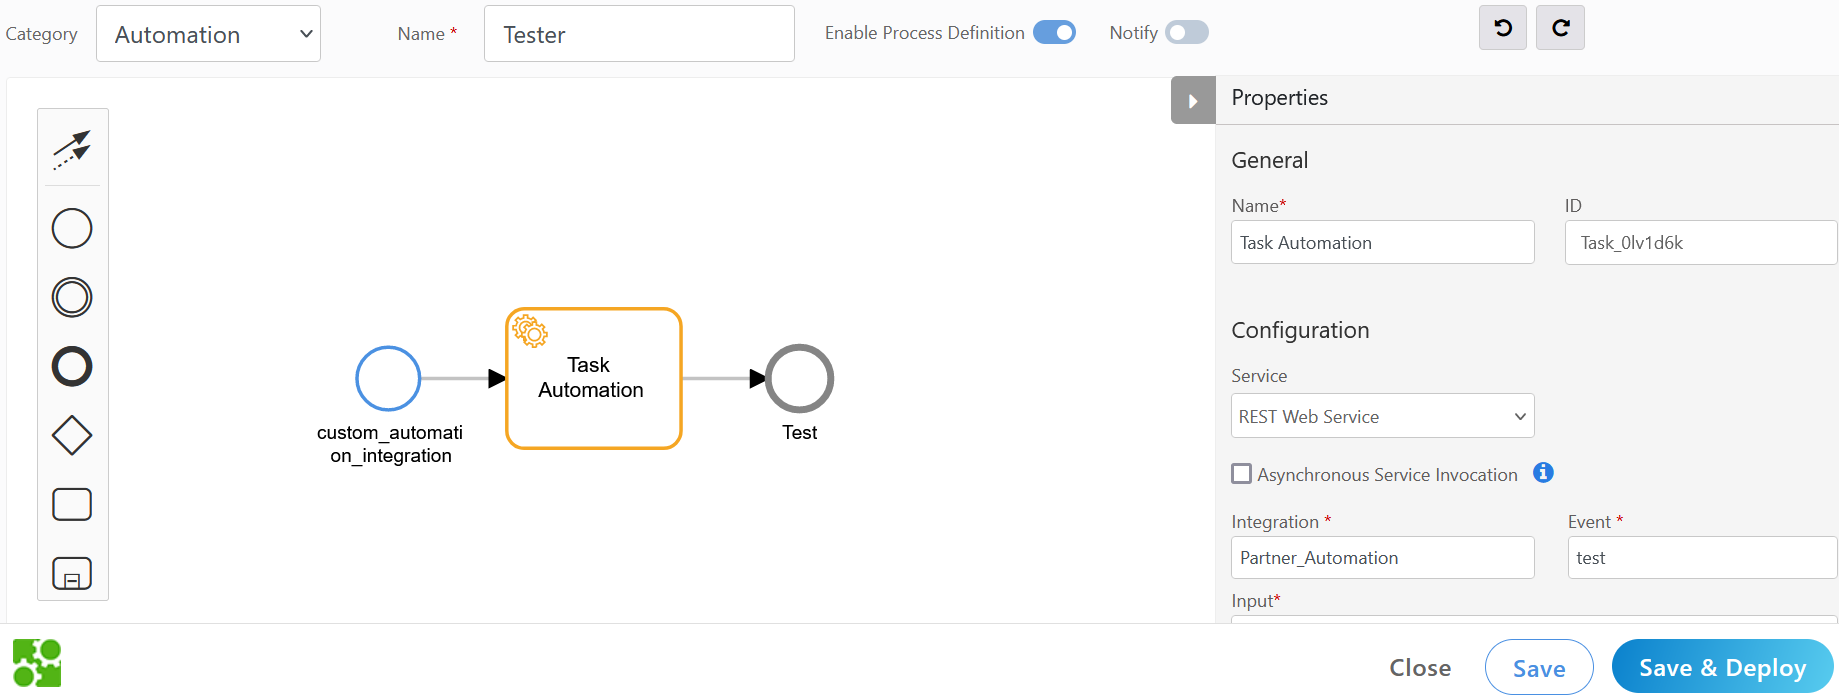
After the integration is successfully installed, the name of the integration and its event details are visible for creating workflows in process definition workflows.
Configure custom automation integration
Follow these steps to configure the integration:
Click All Clients, select a client.
Click Setup > Account.
Select the Integrations tile.
The Installed Integrations screen is displayed, with all the installed applications. Click + ADD on the Installed Integrations page.
If you do not have any installed applications, you will be navigated to the Available Integrations page. The Available Integrations page displays all the available applications along with the newly created application with the version.
Note: Search for the application using the search option available. Alternatively, use the All Categories option to search.Click +ADD on the Custom (Automation) tile.
Enter the following information:

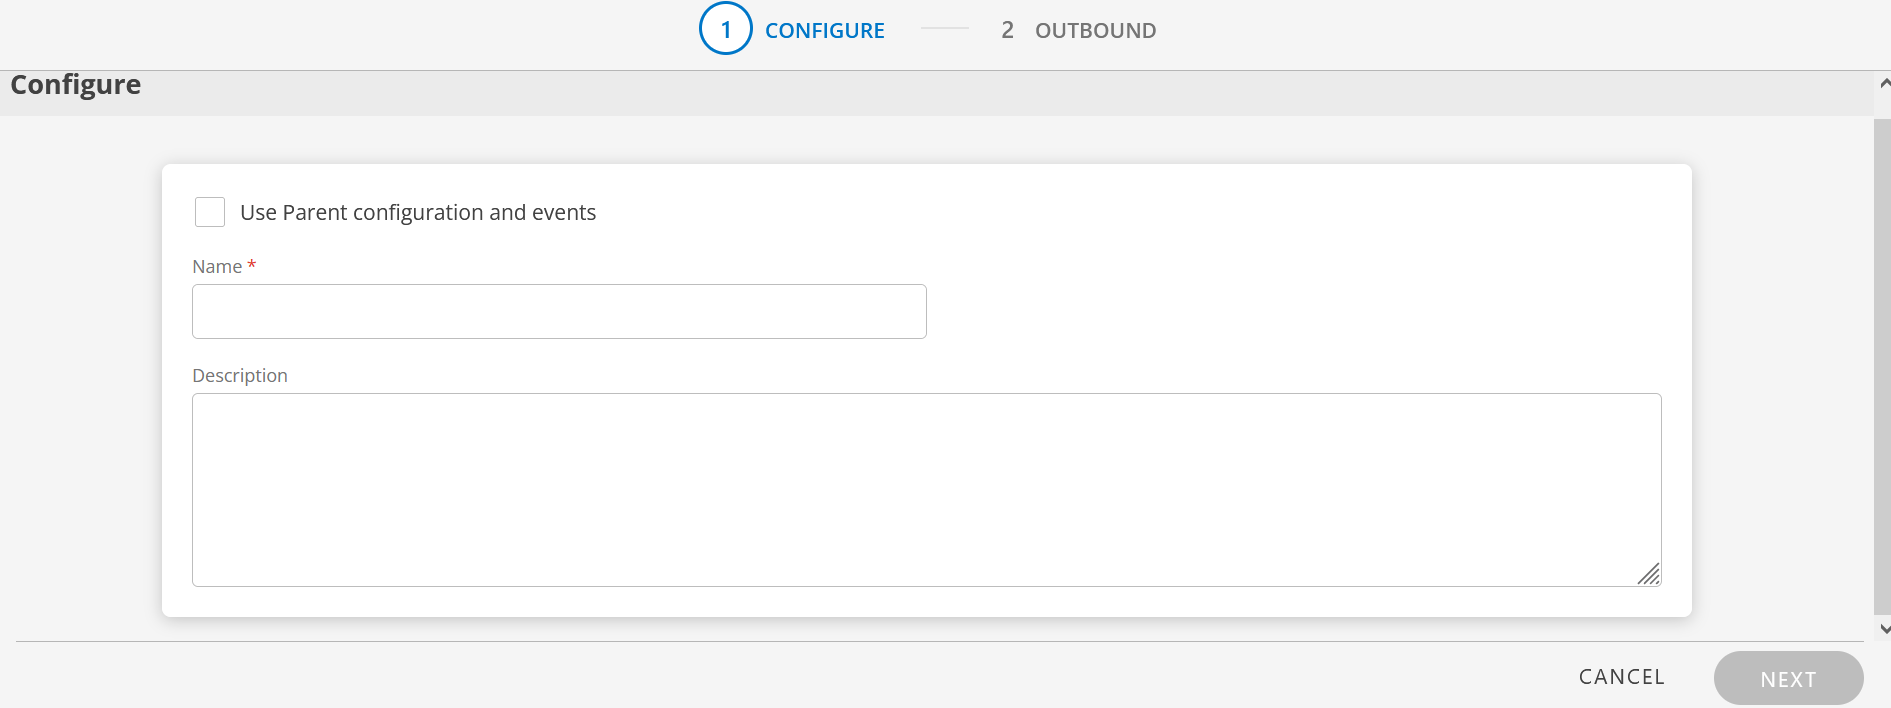
CONFIGURE
Field Name Field Type Description Use Parent configuration and events Checkbox Select this option to inherit properties of a parent integration automatically.
Select the Service Provider/Partner's custom integration from the drop-down list as applicable.Name String Enter a unique name for the integration. Description String Provide a description for the integration. Note: If you select Use Parent configuration and events option, the Name and Description fields are disabled. These fields will be inherited along with other properties like configuration, events, outbound payload properties, outbound mapping attributes.
Click Next. The OUTBOUND screen is displayed.
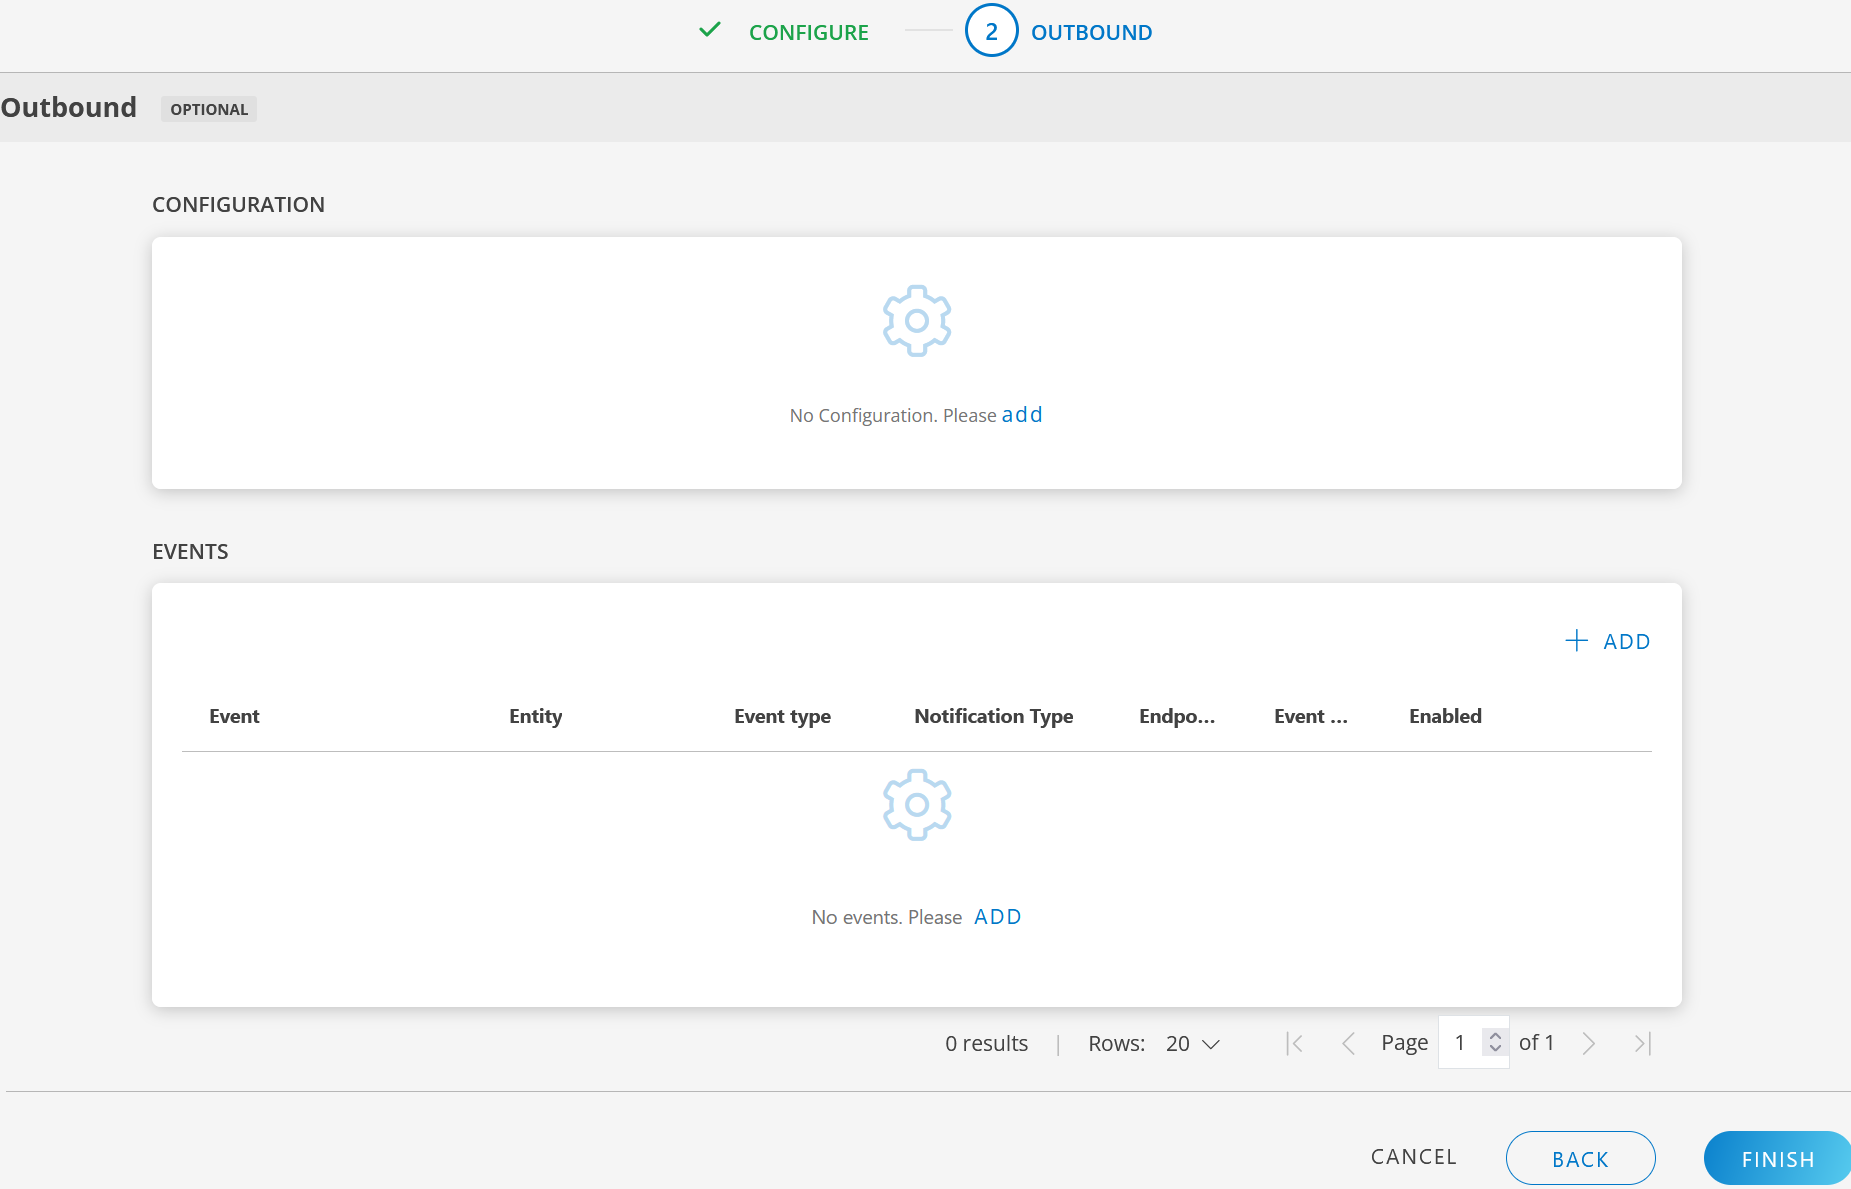
CONFIGURATION: Click add and enter the following information in the ADD CONFIGURATION window:
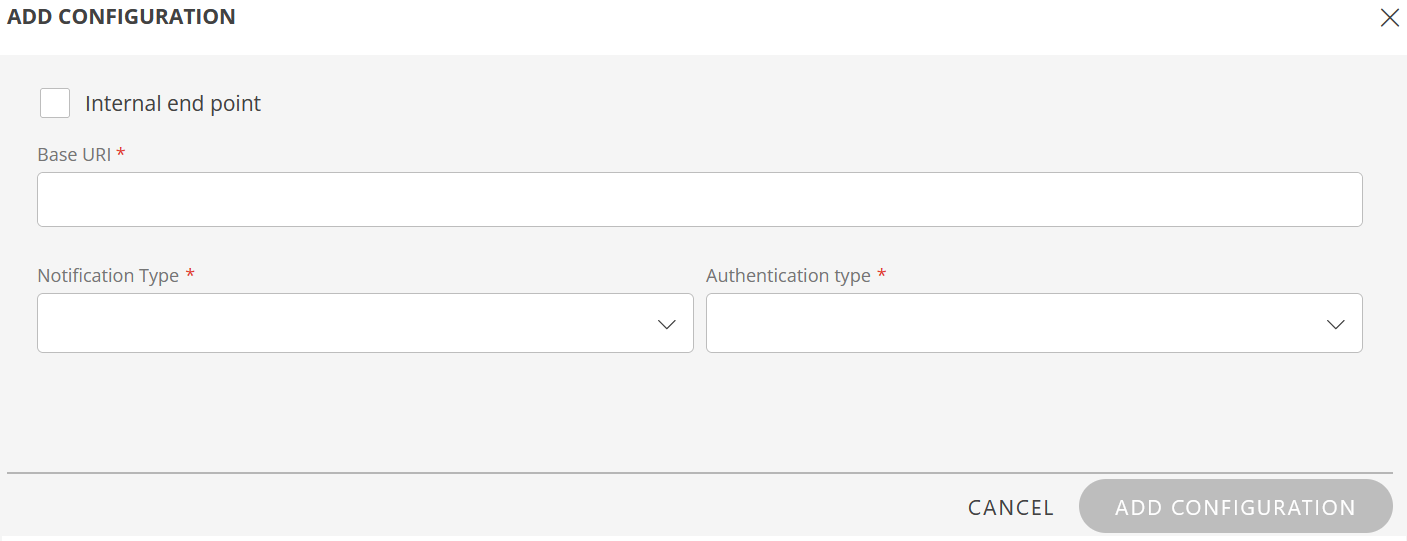
Enable Internal end point option, if you want to execute any internal APIs. Once enabled, the Base URI is auto populated.
Field Name Field Type Description Base URI String Enter the Base URI.
Example:https://app1-internal.opsramp.netNotification Type Dropdown Select notification type as REST API or SOAP API based on your requirements. Authentication Type Dropdown Select an Authentication Type: None, Basic, OAuth2, JWT, Custom.
The Authentication Types are displayed based on the Notification Type selected.See Outbound - Configuration for more information.
Click ADD CONFIGURATION. The configuration details are added and displayed in the Configuration section.
- Use the edit icon to edit the details.
EVENTS: Send notifications when an action is performed on OpsRamp entities.
Click +ADD and enter the following information in the ADD EVENT window: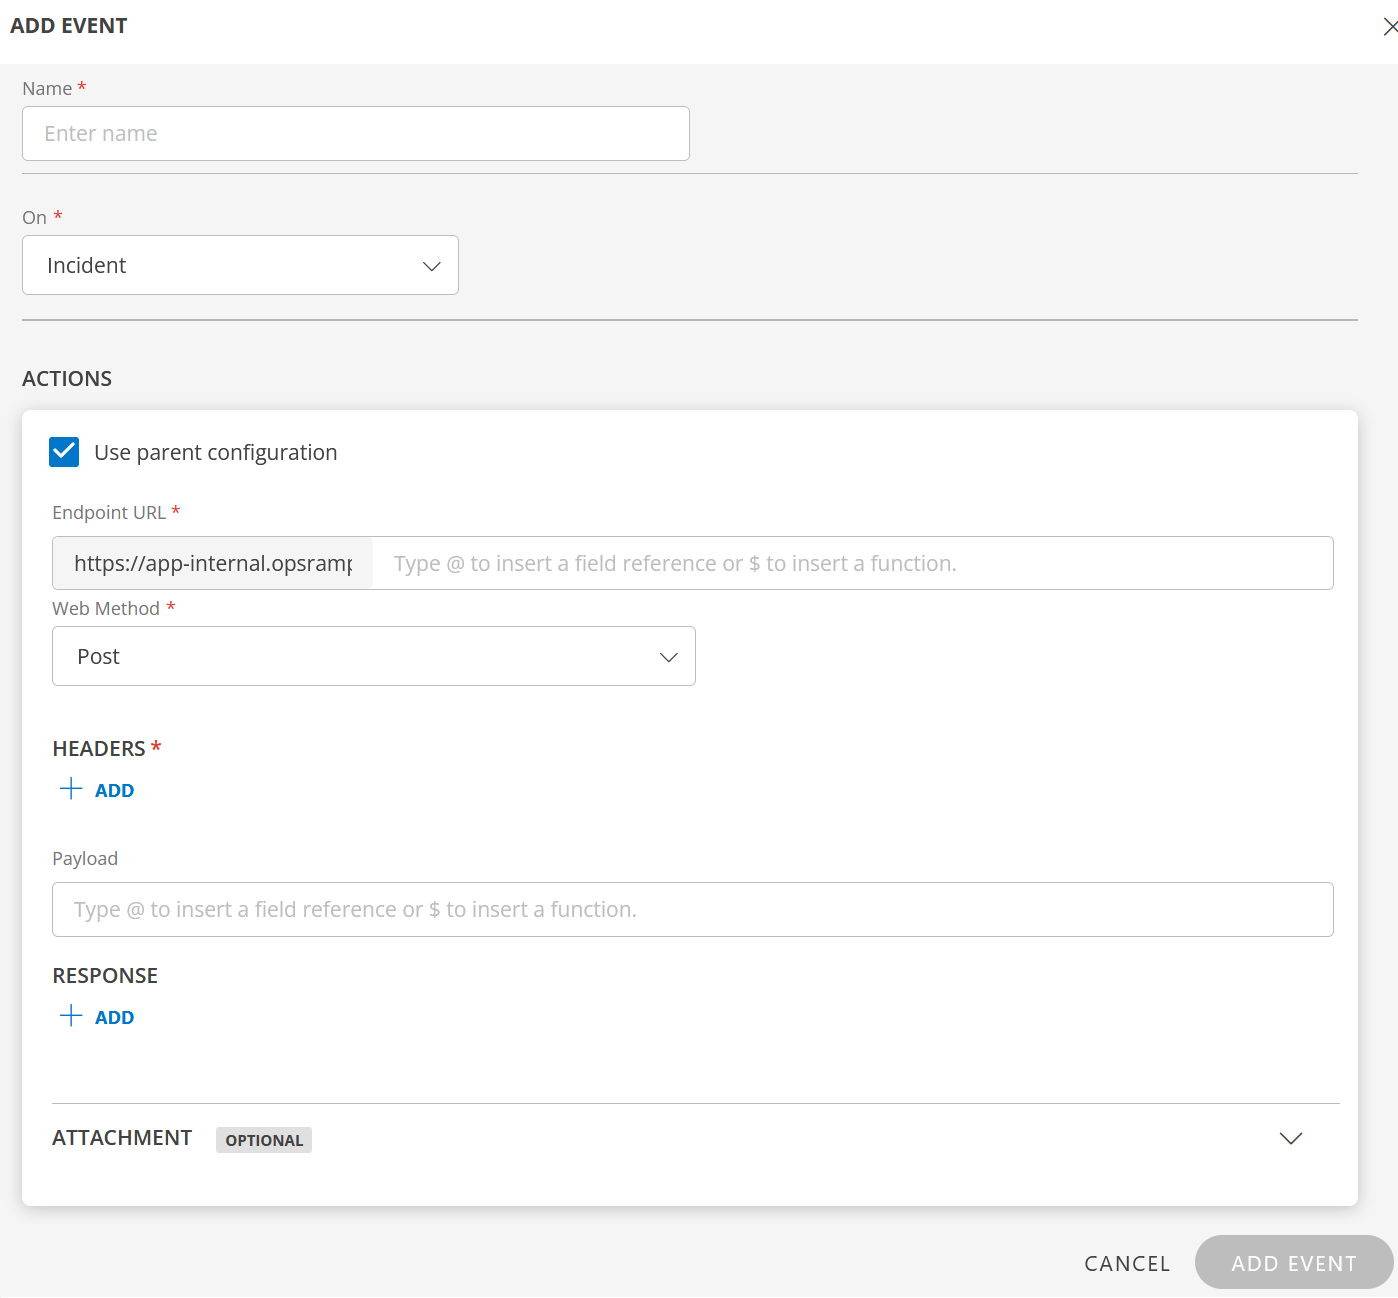
Field Name Field Type Description Name String Enter a name for the event.
This name is displayed as the automation integration name and is visible on the process definition screen while creating process workflows.On Dropdown Select an entity from the drop-down list.
The integration is displayed only for events of the selected option in the process definition window.- Use the edit icon to edit the details.


ACTIONS: Enter the following information in the ACTIONS section:
If you want to inherit parent configuration, select Use parent configuration checkbox.
| Field Name | Field Type | Description |
|---|---|---|
| Endpoint URL | String | The Endpoint URL for API is auto populated. If Internal end point checkbox is selected, the Endpoint URL is auto populated. Enter the actual endpoint in continuous with the pre-populated value. Give a space and enter $ to get a list of tokens. |
| Notification Type | Dropdown | Select notification type as REST API or SOAP API based on your requirements. |
| Authentication Type | Dropdown | Select an Authentication Type: None, Basic, OAuth2, JWT, Custom. The Authentication Types are displayed based on the Notification Type selected. |
| Web Method | Dropdown | Select web method: Post, Put, Get, Delete, or Patch. |
See Outbound - Configuration for more information.
HEADERS: Click +ADD and select the Key and Value from the dropdowns, and click SAVE to add the header.
You can also type the values in the boxes and select the values to add.
- Enter the payload in the box. Give a space and enter
$to get a list of tokens.
RESPONSE: Click +ADD. Select Key from the dropdown, enter Value in the box, and click SAVE to add the response.
ATTACHMENT (OPTIONAL): Click the down arrow to open the Attachment section. This section is optional.
| Field Name | Field Type | Description |
|---|---|---|
| Attachment Endpoint URL | String | Enter Attachment Endpoint URL. Give a space and enter $ to get a list of tokens. |
| Process Type | Dropdown | Select process type: Pre process or Post process. |
| Web Method | Dropdown | Select web method: Post, Put, Get, Delete, or Patch. |
ATTACHMENT HEADERS: Click +ADD and enter the following information:
- Select Key and Value from the dropdowns. You can also type the values in the boxes and select the values to add.
- Click SAVE to add Attachment Header.
Attachment Payload: Enter Attachment Payload.
Give a space and enter$to get a list of tokens.
See Integration Events for information on how to add a placeholder.Attachment Response: Enter Key and Value in the boxes.
Click ADD EVENT to add the event.
There are some actions you can perform on the Event(s).
See here for more details.Click FINISH. The custom automation integration is installed and displayed under Installed Integrations.
Outbound - Configuration
Based on the Notification Type selected, the values in the Authentication type change.
REST API: If you select REST API as Notification Type, the Authentication type dropdown will have None, Basic, OAuth2, JWT, and Custom options.
- Basic: If you select Basic as Authentication type, enter User Name and Password.
OAuth2: If you select OAuth2 as Authentication type, do the following:- Select Grant Type from the dropdown. If you select Password Credentials or Refresh Token as Grant Type, enter the User Name and Password.
- Enter Access Token URL.
- Enter the Key and Secret.
- Enter the Scope.
- JWT: If you select JWT as Authentication type, do the following:
- Enter Token URL in the box.
- Enter the User Name and Password.
- Enter the Token Payload in the box.
TOKEN HEADERS: The Name and Value is displayed by default. You can change it accordingly.
TOKENS PATH: Enter Name (displayed by default) and Value in the boxes and click SAVE.
RESOURCE AUTHORIZATION HEADERS: Enter Name and Value (displayed by default) in the boxes and click SAVE.- Custom: If you select Custom as Authentication type, do the following:
- Enter Token URL in the box.
- Enter the Token Payload in the box. TOKEN HEADERS: The Name and Value is displayed by default. You can change it accordingly.
TOKENS PATH: Enter Name (displayed by default) and Value in the boxes and click SAVE.
RESOURCE AUTHORIZATION HEADERS: Enter Name and Value (displayed by default) in the boxes.
CUSTOM PARAMETERS: Enter the Key and Value in the boxes and click SAVE to save the custom parameter.- Basic: If you select Basic as Authentication type, enter User Name and Password.
SOAP API: If you select SOAP API as Notification Type, the Authentication type dropdown will have None and Basic options.
- Basic: If you select Basic as Authentication type, enter User Name and Password.
Actions on Integration
You can perform actions like View Logs, Export, Edit, and Uninstall on the integration.
- See Actions on Integration for more information.
Audit Logs
View Outbound logs from the View Logs option for the integration. You can view if the event was successful or not.
See Audit Logs for more information.
Viewing Process Automation Integration and Events
Automation integration and its related integration events are visible in the process definition for creating process workflows.