Introduction
A roster is a list of scheduled duties for organization users.
Permissions
The following permissions are required to view rosters:
| Type of user | Category | Permission Type | Permission Value |
|---|---|---|---|
| SP/MSP | Alerts | Alerts | View |
| Client | Account Administration | Administration | Administration |
| Alerts | Alerts | View |
Any one of the following permissions is required to manage (add, update, or remove) rosters:
| Category | Permission Type | Permission Value |
|---|---|---|
| ALERTS | Alerts | Manage |
| TICKETS | Incident | Manage |
| TICKETS | Service Desk | Manage |
Create a Roster
Follow these steps to create a roster:
Navigate to Setup > Account. The Account Details page is displayed.
Click the Users and Permissions tile on the Account Details page. The Permission Sets page is displayed.
Click the ROSTERS tile.
Click +ADD. The Roster Details page is displayed.
Provide the following information in the fields:
Property Description Roster Name Name of the roster Time Zone Roster time zone Description A description of the roster Click +ADD under SHIFTS. A slide-out appears.
Provide the following information to add Shift details:Property Description Shift Name Roster shift name Schedule Details Select the required schedule recurrence: - One-time
- Daily
- Weekly
- Monthly
Start Time Select Start date and time in hours and minutes. End Time Select End date and time in hours and minutes. Users Users assigned to the shift. - Select a user(s) from the Users dropdown.
Groups If you want the user groups to be roster members and if user groups are defined: - Select a user group(s) from the Groups dropdown.
Click Done. The Shift is created and displayed.

- Click Save. The roster is created and displayed in the list, on the Rosters page.
You can perform the following actions after creating a roster:
| Action | Procedure/Description |
|---|---|
| Search | To search for a roster:
|
| View and Update | To view the details of a roster, click the roster name. To update a roster:
|
| Remove | To remove a roster:
|
You can view the number of rosters on the Users and Permissions tile on the ACCOUNT DETAILS page.
Shifts View
Shifts configured in a roster can be viewed and managed using a combined calendar and grid experience, allowing users to switch between a time‑based visual view and a detail‑oriented list view depending on their needs.
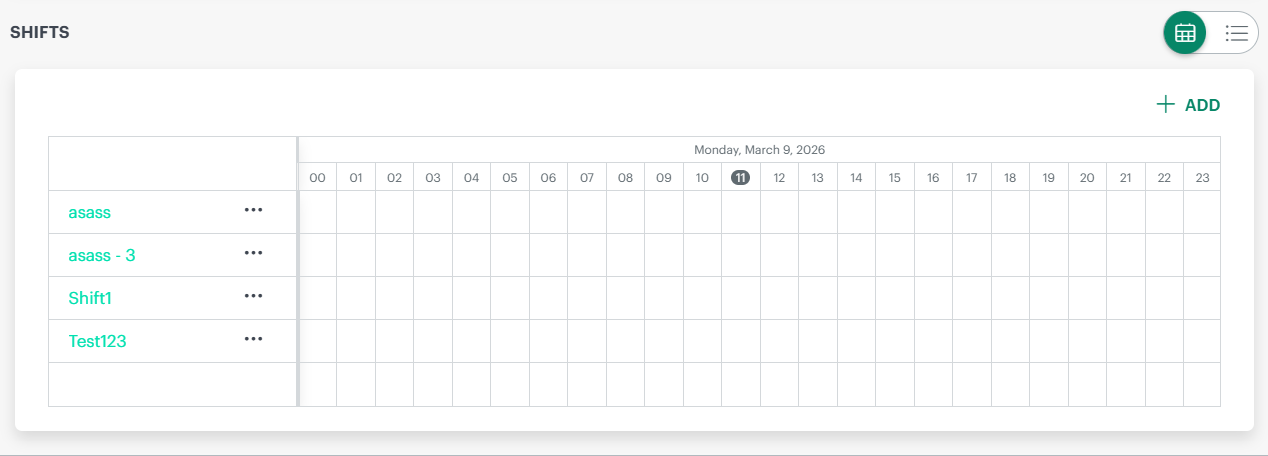
In the calendar view, shifts are displayed on a horizontal timeline:
- Each row represents a shift.
- This view helps users visually verify shift coverage, identify overlaps, and detect gaps across the day.
- Use the three‑dot (⋮) action menu next to a shift to view details, create a copy, or remove the shift.
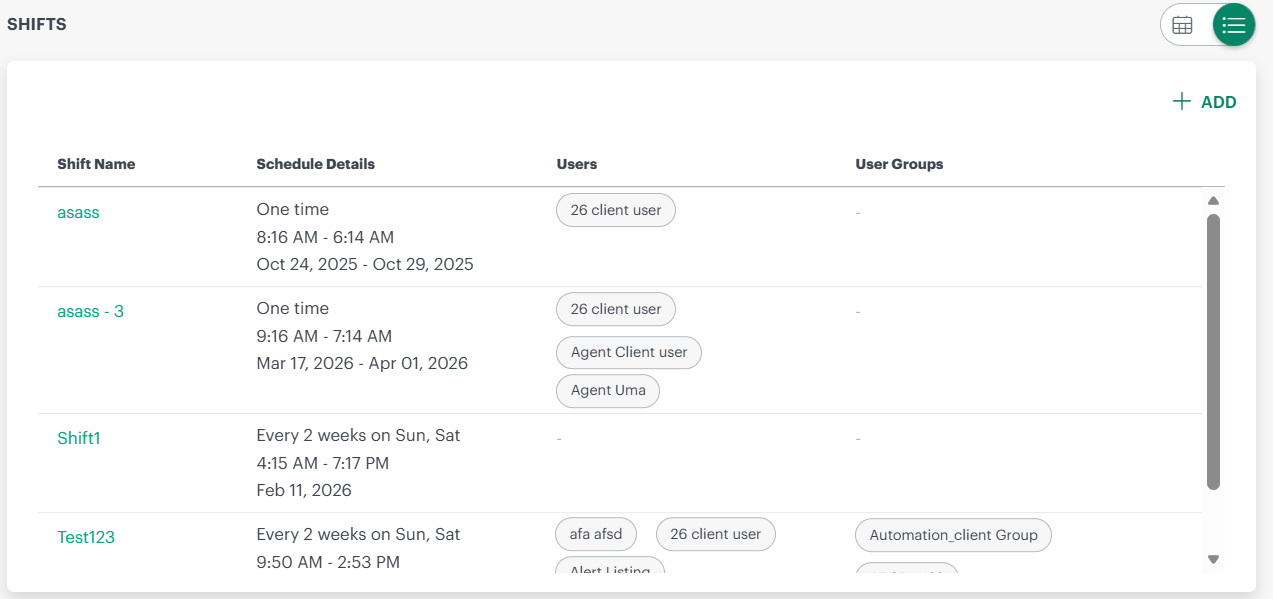
In the grid (list) view, shifts are displayed in a tabular format showing detailed information for each shift, including:
- Shift Name
- Schedule Details (recurrence type with start and end dates/times)
- Users. If more than four users are assigned to a shift, the grid displays a +more indicator. Hover on the +more displays the complete list of assigned users or groups.
- User Groups