Introduction
As your IT ecosystem grows or undergoes restructuring, it’s essential to keep your partner records accurate and up to date. Changes such as company mergers, role transitions, updates to service offerings, or security requirements may require modifications to how a partner is configured within the platform. Regularly reviewing partner information ensures that the platform reflects the current organizational structure and operational responsibilities, reducing the risk of misaligned access or outdated configurations.
OpsRamp provides a centralized and secure way to manage partner configuration settings. Administrators can easily view and edit key details such as account settings, add-on features, security policies, user access, and branding. These capabilities ensure that partners continue to operate under the defined governance frameworks, comply with regulatory and organizational policies, and maintain service integrity.
View and edit partner details
Follow these steps to view and edit partner details:
- Click Setup > Account. The ACCOUNT DETAILS screen is displayed.
- Click Partners tile. The PARTNERS LIST screen is displayed, showing the list of partners.
- Search for the partner and click on partner name. The ACCOUNT DETAILS screen is displayed.
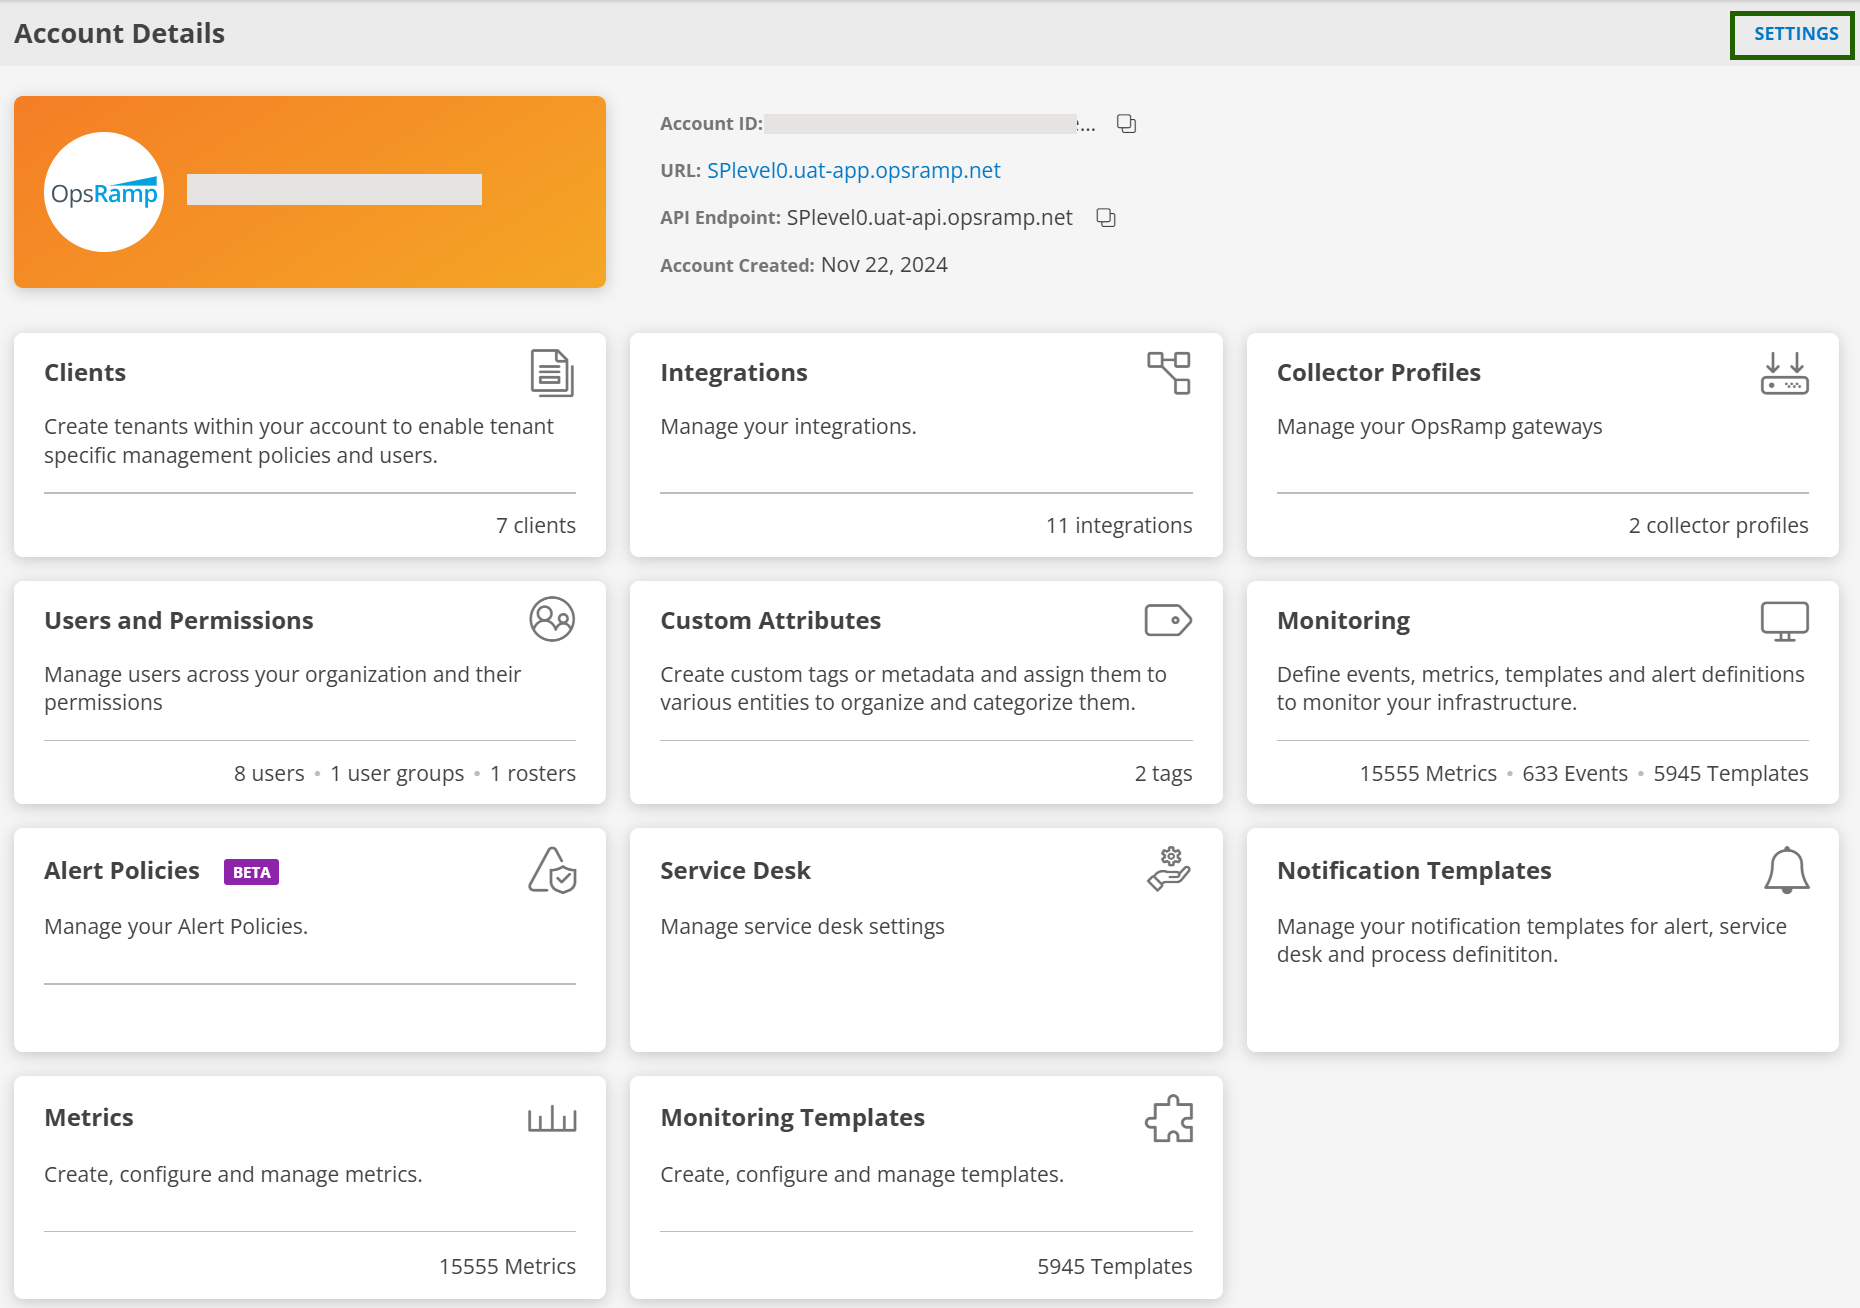
Information related to partner like Account ID, URL, API Endpoint, Account Created date are displayed. - Click SETTINGS located in the upper-right corner of the screen. The ACCOUNT SETTINGS screen is displayed.
- Make the necessary changes in the tabs:
- ACCOUNT: Modify Name, Notification Email, Country, City, State as required.
- ADD-ONS: Add packages and Add-Ons as required.
- SECURITY: Enable Two-Factor Authentication, restrict access to specific IP(s) or modify password policy settings as required.
- BRANDING: Configure custom branding for the partner. Using custom branding, you can customize the platform UI by adding company logo, providing a website title, and changing the look and feel of the website to match the company theme.
See below for more information.
Note: When you add a new URL in production, you must contact support to have a DNS entry added for the new URL.
Configure custom branding
Follow these steps to configure custom branding:
From ACCOUNT SETTINGS screen, click BRANDING tab.
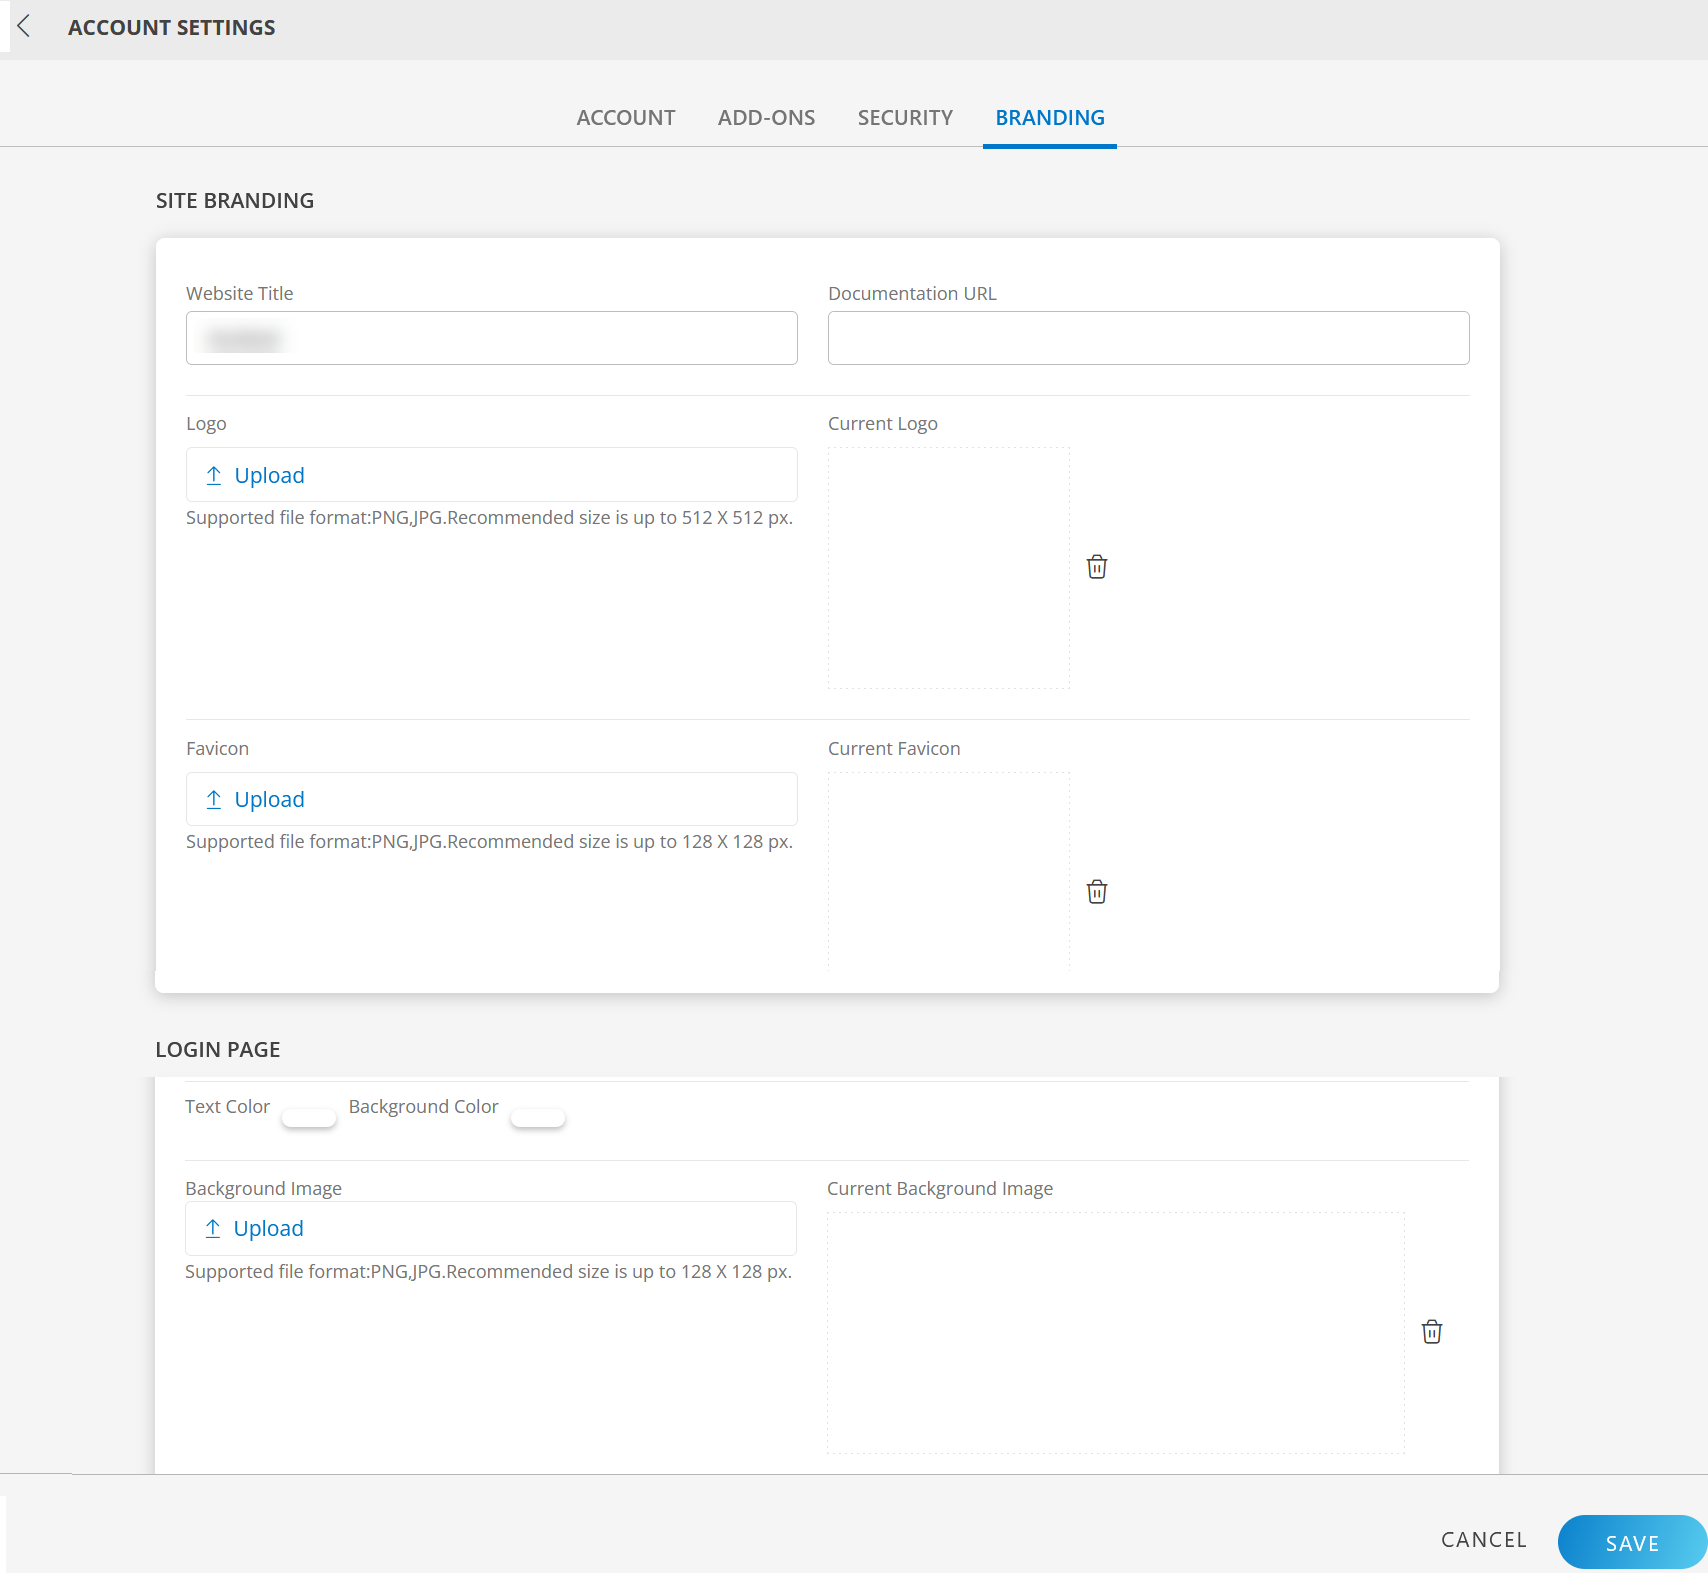
Enter the following branding elements:

SITE BRANDING
Branding Element Field Type Description Website Title String Custom website title that is used in the browser tab. Documentation URL String URL of the documentation site. Logo File Input Custom image. A logo that is used for the navigation bar and login page. - Supported file format: PNG, JPG
- Size: Less than 10KB (recommended)
- Dimension:
- Height: 512px
- Width: no more than 512px
Favicon File Input Custom image that is used in the browser tab. - Supported file format: PNG, JPG
- Size: Less than 10KB (recommended)
- Dimension: square, 128 x 128 px
LOGIN PAGE
Branding Element Field Type Description Page Header String Header text for the login page. Location is on the first line of the login page. Page Subheader String Sub-header text for the login page. The text displays on the second line of the login page. Text Color Color picker Color of the header and sub-header text. Background Color Color picker Colored layer around the logo. Background Image File Input Background image on the login page. The image appears darker than the original due to an overlay on top of the image. - Supported file format: PNG, JPG
- Size: Up to 128 x 128px (preferred)
- Dimension: 1440x900 (recommended). Smaller images are tiled.
Current Background Image field displays the uploaded Background Image.
Click SAVE.
The Two-factor authentication popup window is displayed whenever you make changes in any of the fields in the Account settings window, as a verification step. After you have validated, the partner account settings are saved.
Note: This verification step is triggered only if two-factor authentication is enabled for the tenant.
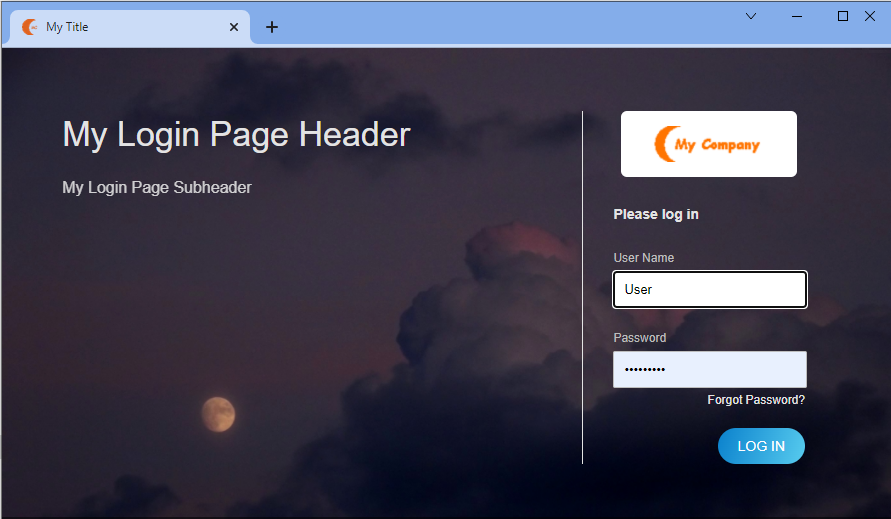
Branding example
Following values define partner-level custom branding using a custom logo, favicon, background, and text labels: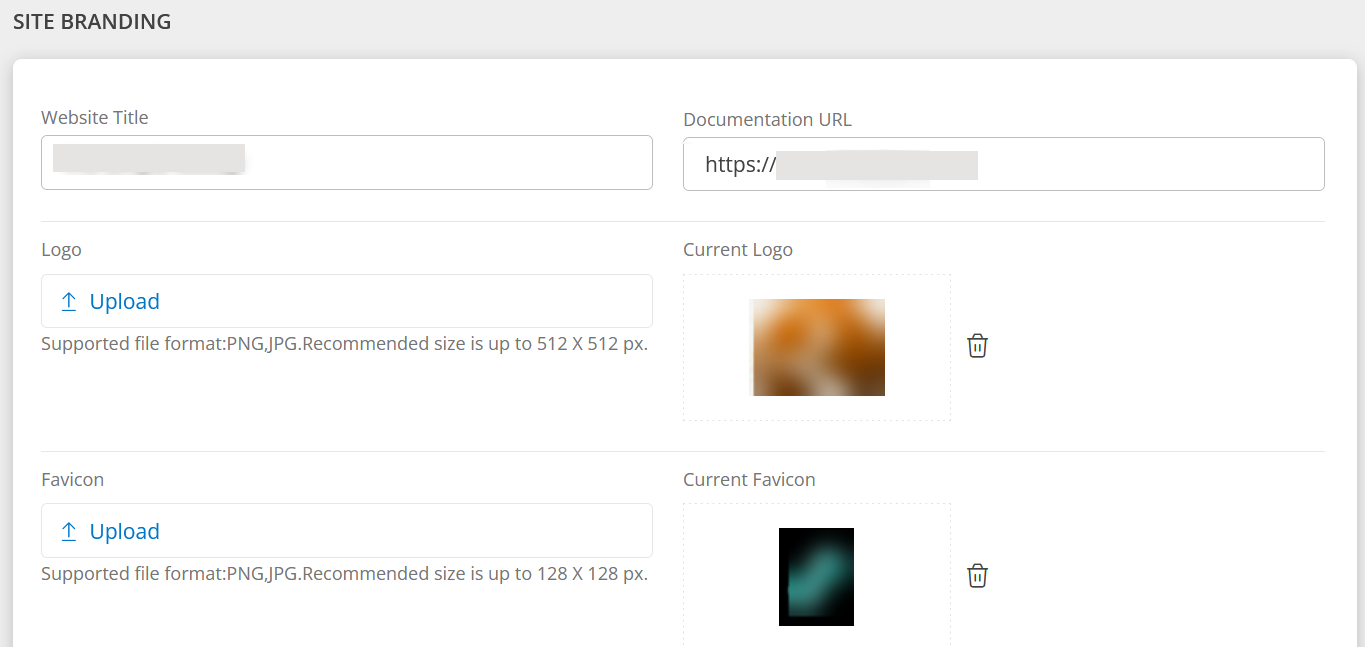
Following image shows the custom branding login screen:
Filter
Use the filter dropdown to view partners that are in Active, Inactive, and All Status (active and inactive) statuses:
Follow these steps to view partners based on their current status:
- Click Setup > Account. The Account Details screen is displayed.
- Click Partners tile.
- Click the filter dropdown available at the right-top corner of the screen and select the required option:
- Active - Displays list of active partners.
- Terminated - Displays list of inactive partners.
- All - Displays list of active and inactive partners.