Overview
This page describes how to install and register the OpsRamp Classic Gateway on a supported public cloud platform.
The installation and registration steps are identical for AWS, Microsoft Azure, and Google Cloud Platform (GCP).
Only the VM deployment mechanism differs by cloud provider.
This page documents the common post‑deployment workflow, using AWS as the reference.
Prerequisites
Before deploying the Classic Gateway on AWS, Azure, or GCP, ensure your environment meets the necessary prerequisites to support a successful deployment and connection to the OpsRamp Cloud.
1. System and Server Requirements
Make sure your infrastructure meets the minimum hardware and software specifications for running the Classic Gateway virtual machine.
- For detailed requirements, refer to the Classic Gateway Prerequisites documentation.
2. Network Access and Whitelisting
To enable uninterrupted communication between the Gateway and the OpsRamp SaaS platform:
- Whitelist all required IP addresses, domains, and ports in your firewall or AWS security group settings.
- This includes endpoints necessary for registration, updates, and data transmission.
- For the complete list of required addresses, refer to the IP Whitelist documentation.
3. Proxy Configuration (Optional)
If your organization uses a proxy server for outbound traffic control:
- Access the Gateway Admin UI at
https://<Gateway IP>:5480. - Navigate to Network > Network Connection Settings.
- Configure the appropriate proxy details to ensure all outbound communication (e.g., registration, monitoring data, and tunnel connectivity) is routed correctly.
Note
This step should be performed only after the successful preparation of the Classic Gateway Virtual Machine (VM). Ensure that the VM is fully configured and operational, and that port 5480 is accessible from your network before proceeding.4. Subscribe to Ubuntu 22.04 LTS (Jammy Jellyfish)
If you’re deploying the Gateway for the first time:
- Ensure your AWS account is subscribed to the Ubuntu 22.04 LTS - Jammy image from the Amazon Marketplace.
- This OS version is required for compatibility with the latest Gateway build.
Installation and Registration Steps
Step 1: Prepare the Classic Gateway VM
Refer to the Prepare Classic Gateway using OpsRamp Image document for details.
Step 2: Change Password
After launching your Gateway EC2 instance, the first step is to secure your system by changing the default password.
To change the default password:
- Open the Gateway Admin UI at:
https://<Gateway IP>:5480. - From the Administration Menu, go to Password and change the password.
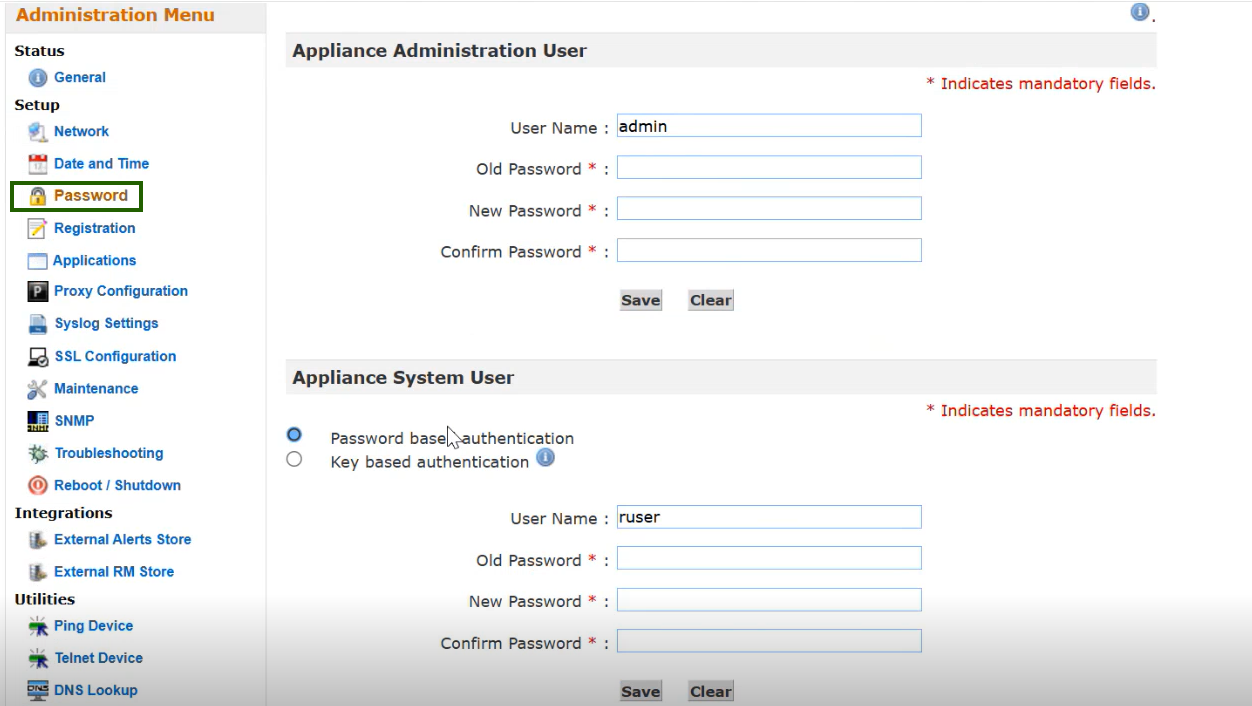
Note
- If you are accessing the Gateway Admin UI for the first time, you will be required to change the password immediately.
- For security best practices, it is strongly recommended to change the default system password right after provisioning the Gateway. This helps prevent unauthorized access.
Step 3: Update Hostname and IP Address (Optional but Recommended)
Customizing your Gateway’s hostname and ensuring the IP settings are accurate helps with better identification and network configuration, especially in larger environments.
- Open the Gateway Admin UI at:
https://<Gateway IP>:5480. - From the Administration Menu, go to Network and update the hostname and IP address.
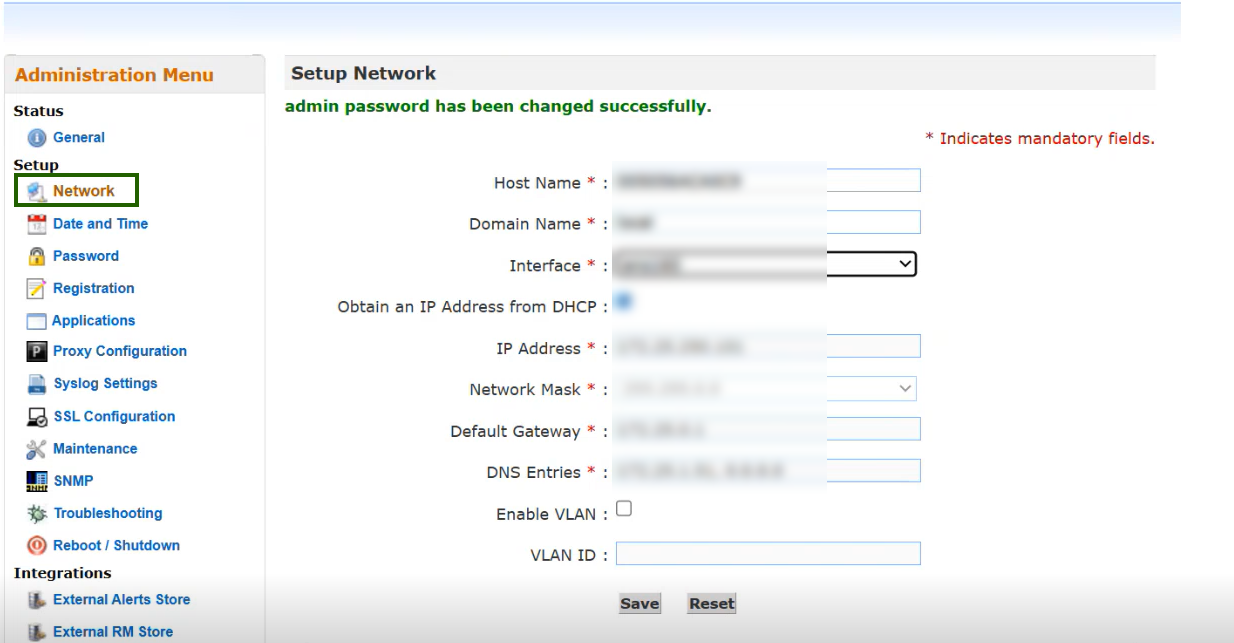
Ensure that the hostname is unique and recognizable, especially if deploying multiple Gateways.
Step 4: Register the Gateway
The final setup step is to register the Gateway so that it becomes active in the OpsRamp platform and can begin performing discovery and monitoring tasks.
Refer to the Register the Gateway page for step-by-step instructions to complete the Gateway installation.
Registration activates the Gateway as a collector and connects it to your client environment in OpsRamp.
Related Installation Details for Azure and GCP
For Microsoft Azure or GCP deployments, refer to the VM preparation guides below. The installation steps are identical across cloud providers; only the VM deployment workflow differs by platform.
- Microsoft Azure: Refer to the Microsoft Azure tab in Prepare Classic Gateway using OpsRamp Image
- GCP: Refer to the GCP tab in Prepare Classic Gateway using OpsRamp Image