Enabling eBPF
The eBPF can be enabled during a fresh installation or via helm upgrade.
A. Enabling eBPF During Installation
If you are installing the Kubernetes 2.0 agent for the first time, follow these steps:
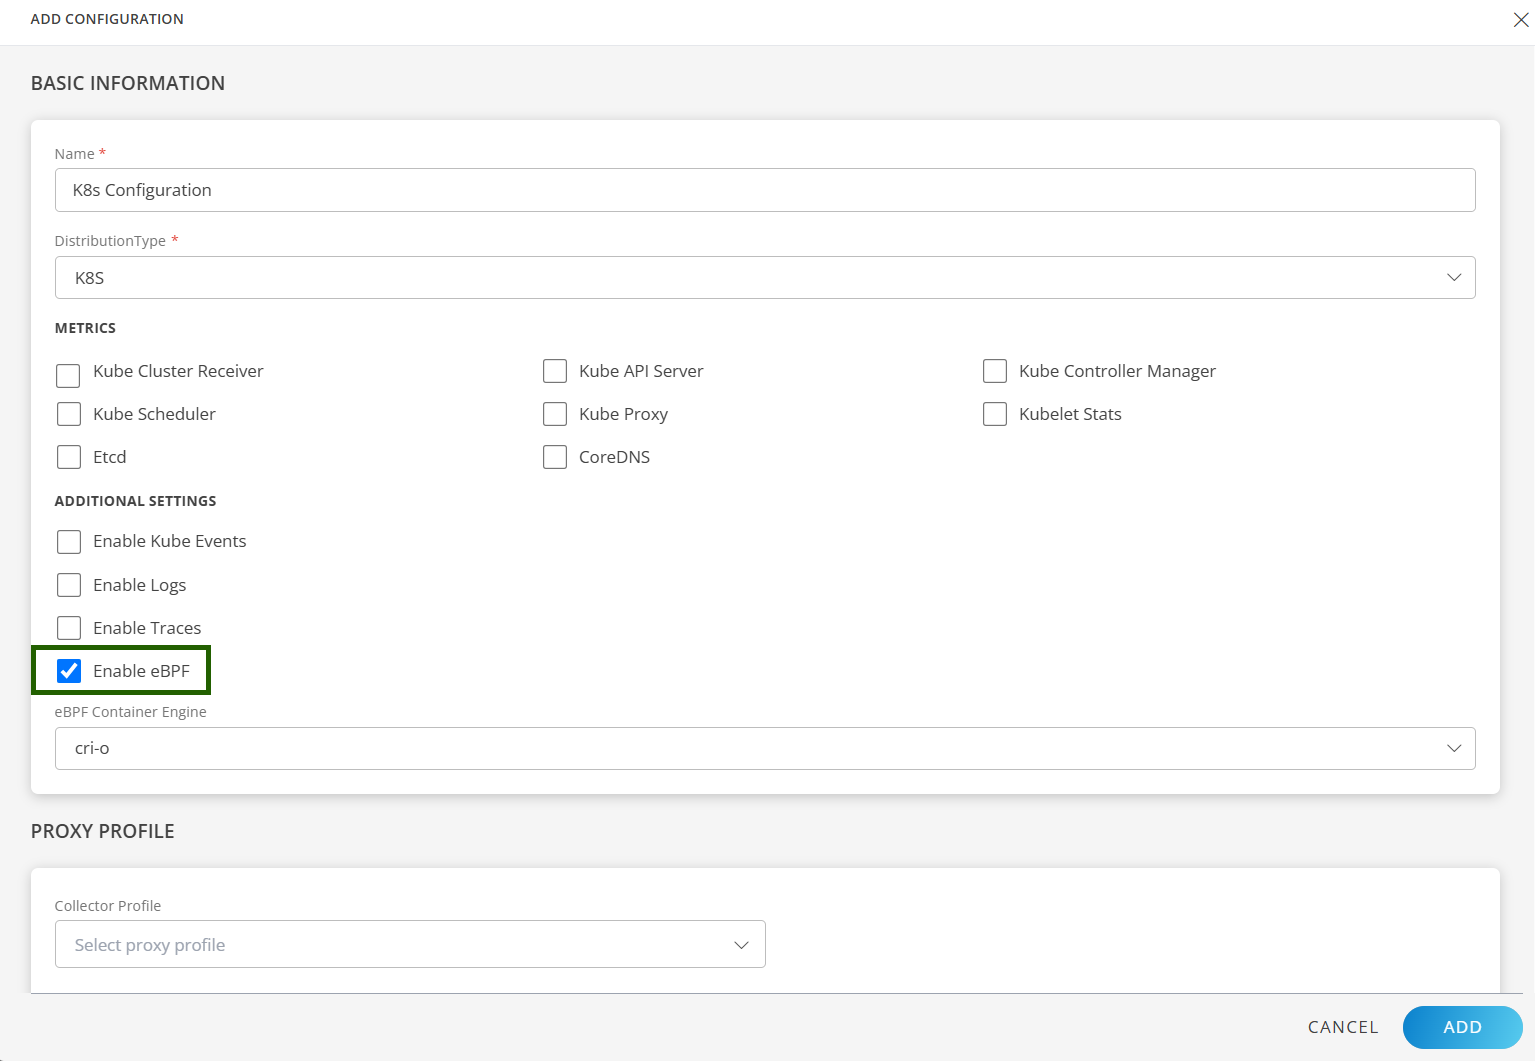
Step 1: Enable eBPF from OpsRamp UI
- Go to Setup → Account → Integrations → Kubernetes 2.0.
- Enable the eBPF checkbox.
- Select your container engine:
- containerd
- cri-o
- docker
--set containerSockFile.containerd=/path/custom/containerd.sock --set containerSockFile.cri-o=/path/custom/crio.sockStep 2: Download the values.yaml File
After enabling the eBPF checkbox, go to the Instructions page and download or copy the YAML file for the Helm installation
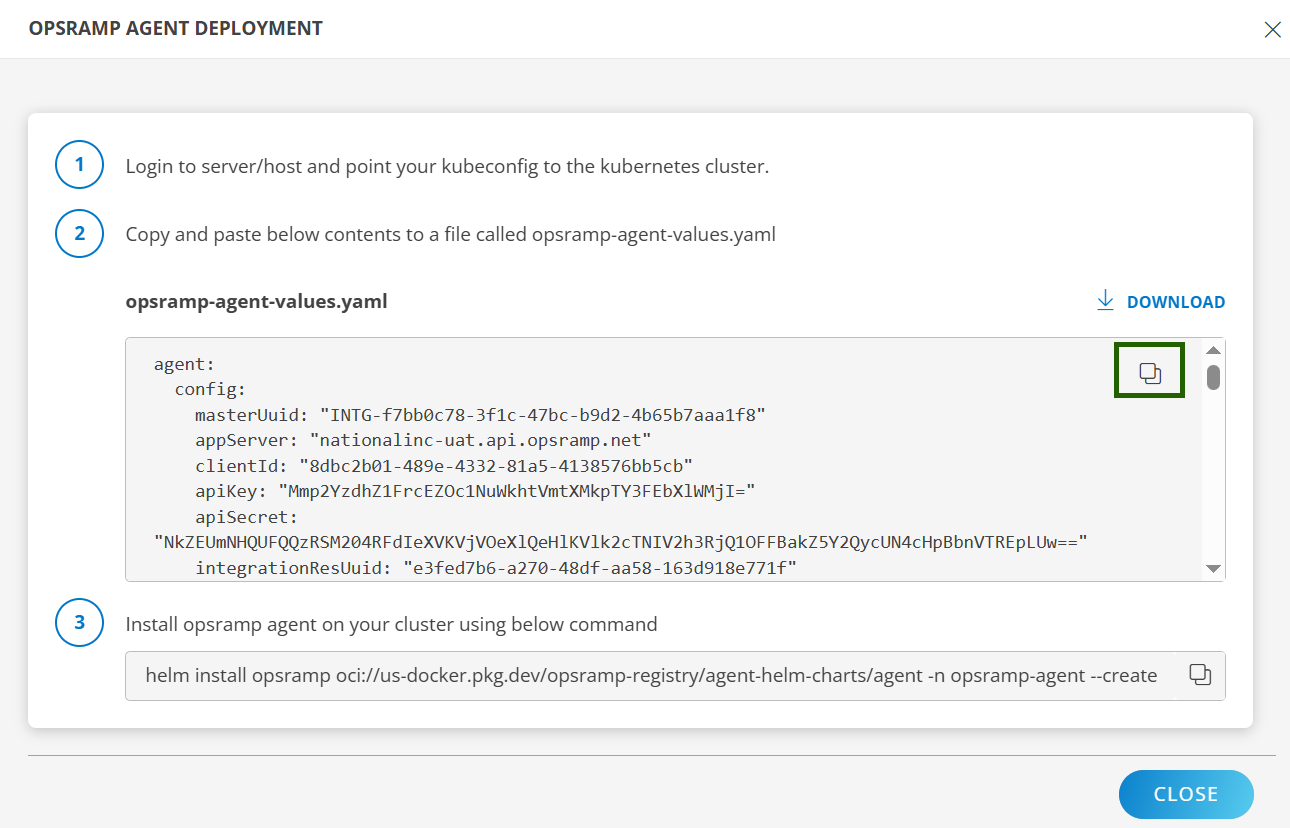
Step 3: Install the OpsRamp Agent on Your Cluster Using Helm
Run the Helm install command.
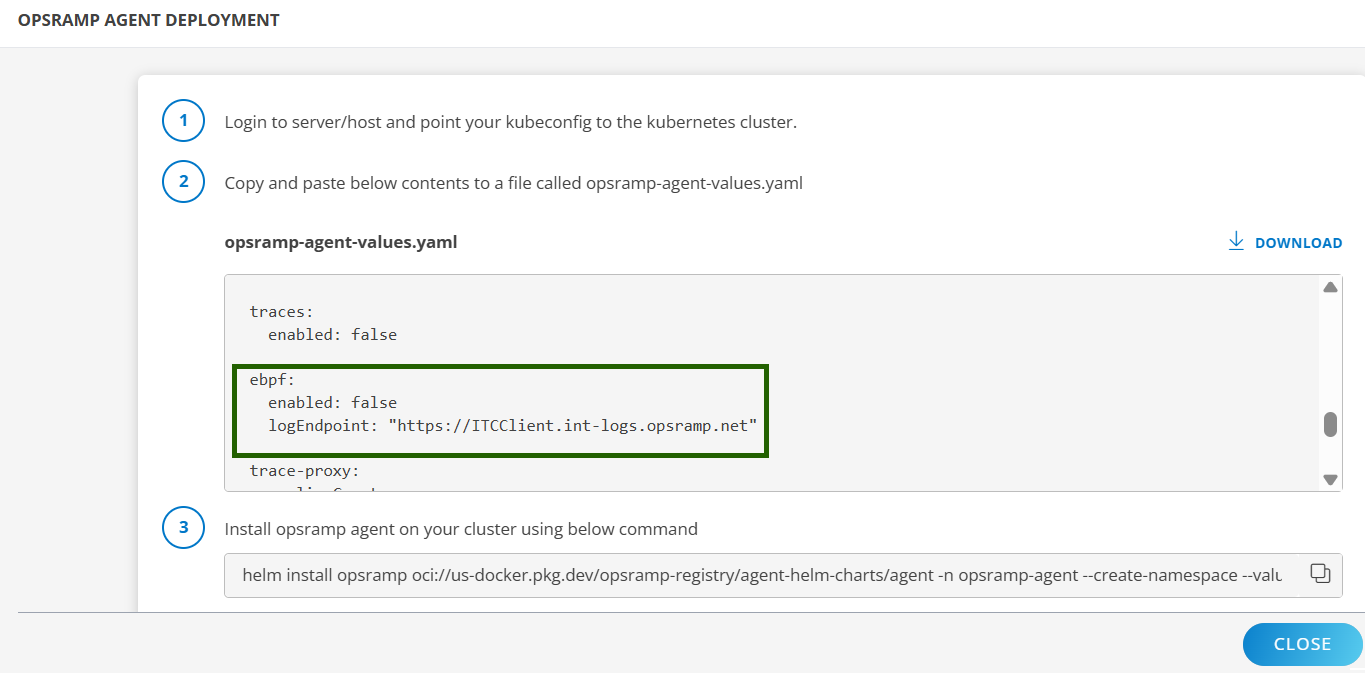
helm install opsramp oci://us-docker.pkg.dev/opsramp-registry/agent-helm-charts/agent -n opsramp-agent --create-namespace --values <download-file-path-or-copied-file-path>.yaml --set ebpf.enabled=true --set ebpf.logEndpoint="int.opsramp.net:443" --set containerSockFile.docker=/run/k3s/cri-dockerd/cri-dockerd.sock"After installation:
ebpf.enabledis set to true.- The selected container runtime appears under containerRuntime in the
values.yamlfile.
Refer to the Kubernetes 2.0 Agent Installation document for detailed steps.
B. Enabling eBPF on an Existing Installation
If the Kubernetes 2.0 Agent is already installed, you can enable eBPF using either method below.
Option 1: Helm Upgrade
Run the following command:
helm upgrade <release-name> <chart> --set ebpf.enabled=trueOption 2: Update Config + Upgrade
- Download latest
values.yaml. - Update the yaml file:
ebpf.enabled=true- Select runtime under
containerRuntime
- Run Helm upgrade.
- A new eworker pod is deployed automatically.
CRD Configuration
By default, eBPF monitors all pods and nodes. Use the CRD to include/exclude specific workloads.
Step 1: Edit the CRD
Run the following command:
kubectl edit netobs networkobservabilityconfigSample CRD
apiVersion: network.agent.opsramp.com/v1
kind: NetworkObservability
metadata:
name: <resource-name>
namespace: <namespace>
spec:
targetCgroupSelectors:
- action: include | exclude
namespaces:
- <namespace1>
- <namespace2>
nodeNames:
- <node1>
- "*"
Key Field Definitions
| Field | Description |
|---|---|
| targetCgroupSelectors | List of selection rules for monitoring |
| action | Include / exclude workloads |
| namespaces | Target namespaces (* allowed) |
| nodeNames | Target nodes (* allowed) |
| matchLabels | Filter workloads by pod labels |
| matchAnnotations | Filter workloads by annotations |
Step 2: Apply Changes
After updating the CRD file, run the following command to apply the changes.
kubectl apply -f crdconfig.yamlStep 3: Verify
kubectl get netobsStep 4: Describe for Details
kubectl describe netobs network-observability-configNote
- You can define multiple selectors for different namespaces or label conditions.
- Selectors + action provide complete control over monitored workloads.
- The CRD works seamlessly with the eBPF agent running on the nodes.